Obmondo Customers: Git Setup
Purpose: This guide walks you through connecting your Git hosting platform to your Obmondo environment to enable seamless deployments.
Prerequisites
- An active account on the Obmondo UI.
- A
linuxaid-configrepository in your Git hosting platform (e.g., GitHub). - Your repository must contain at least one file.
Phase 1: Configure in Obmondo UI
-
Navigate to Git & Deploy: Navigate directly to the Git & Deploy page.
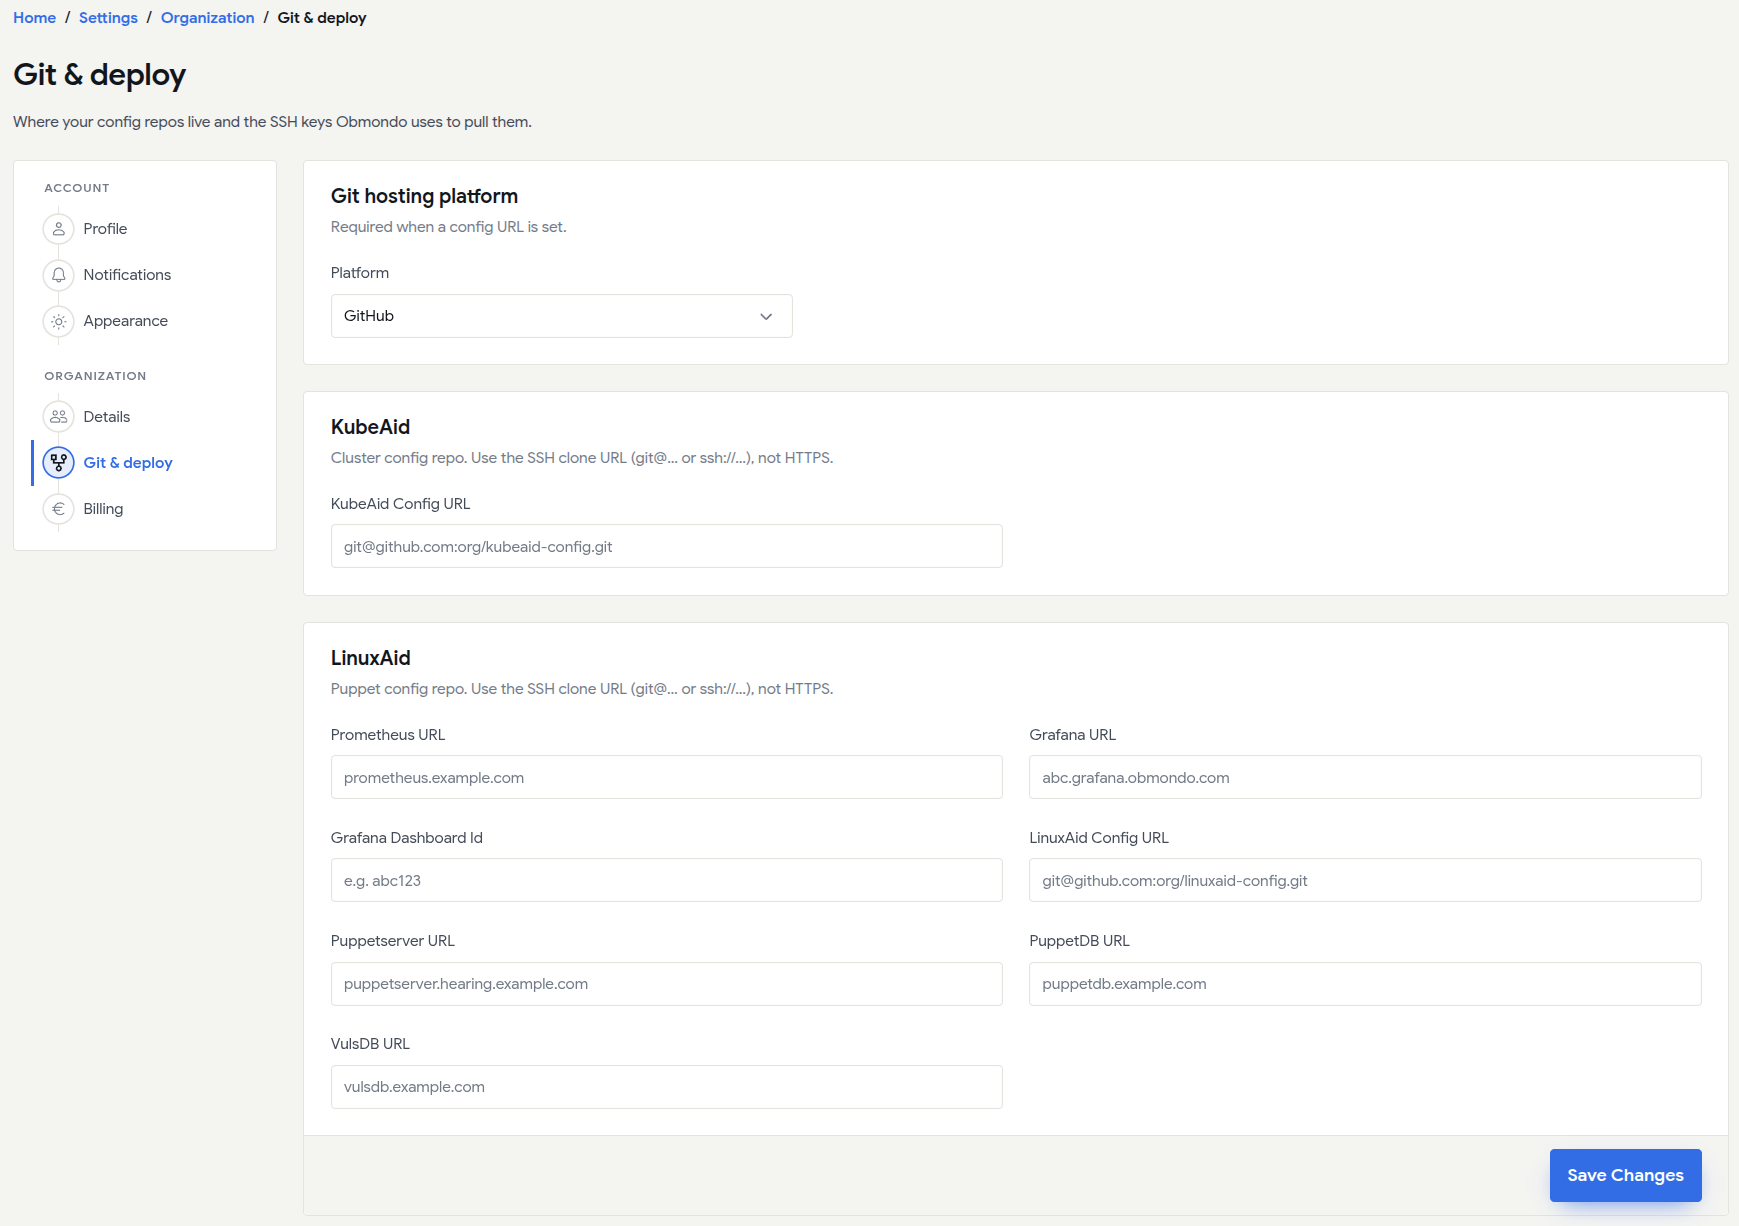
-
Select Platform: Choose your
Git Hosting Platform.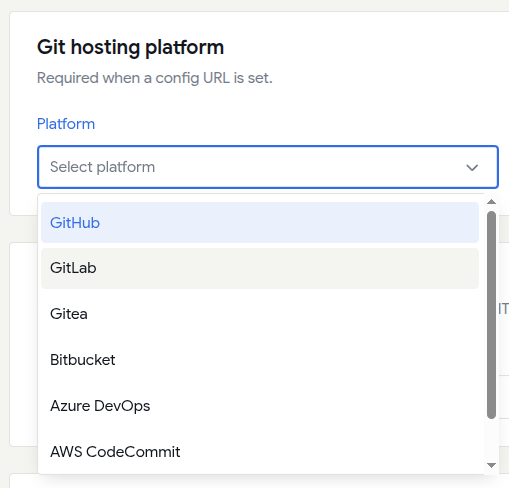
-
Provide Config URL: Enter your
Linuxaid Config URLand clickSave Changes.
-
Generate SSH Key: Locate the
Linuxaid Deploy Keysection and clickGenerate SSH Key.
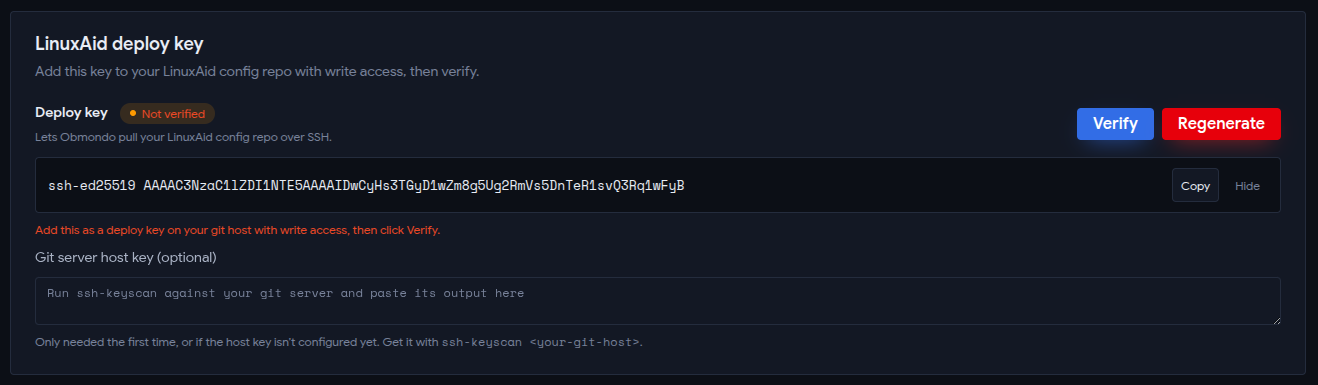
Deploy Key Already Generated
If you have already created one deploy key, and want to re-generate it, you can do so. It will invalidate the previous one.

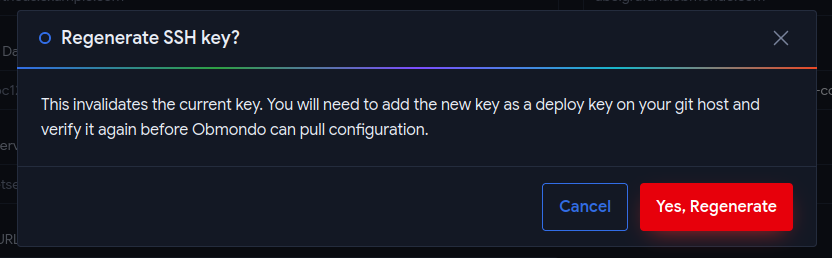
Phase 2: Configure in your Git Repository
-
Add Deploy Key: In your
linuxaid-configrepository, go to Settings > Deploy keys > Add deploy key.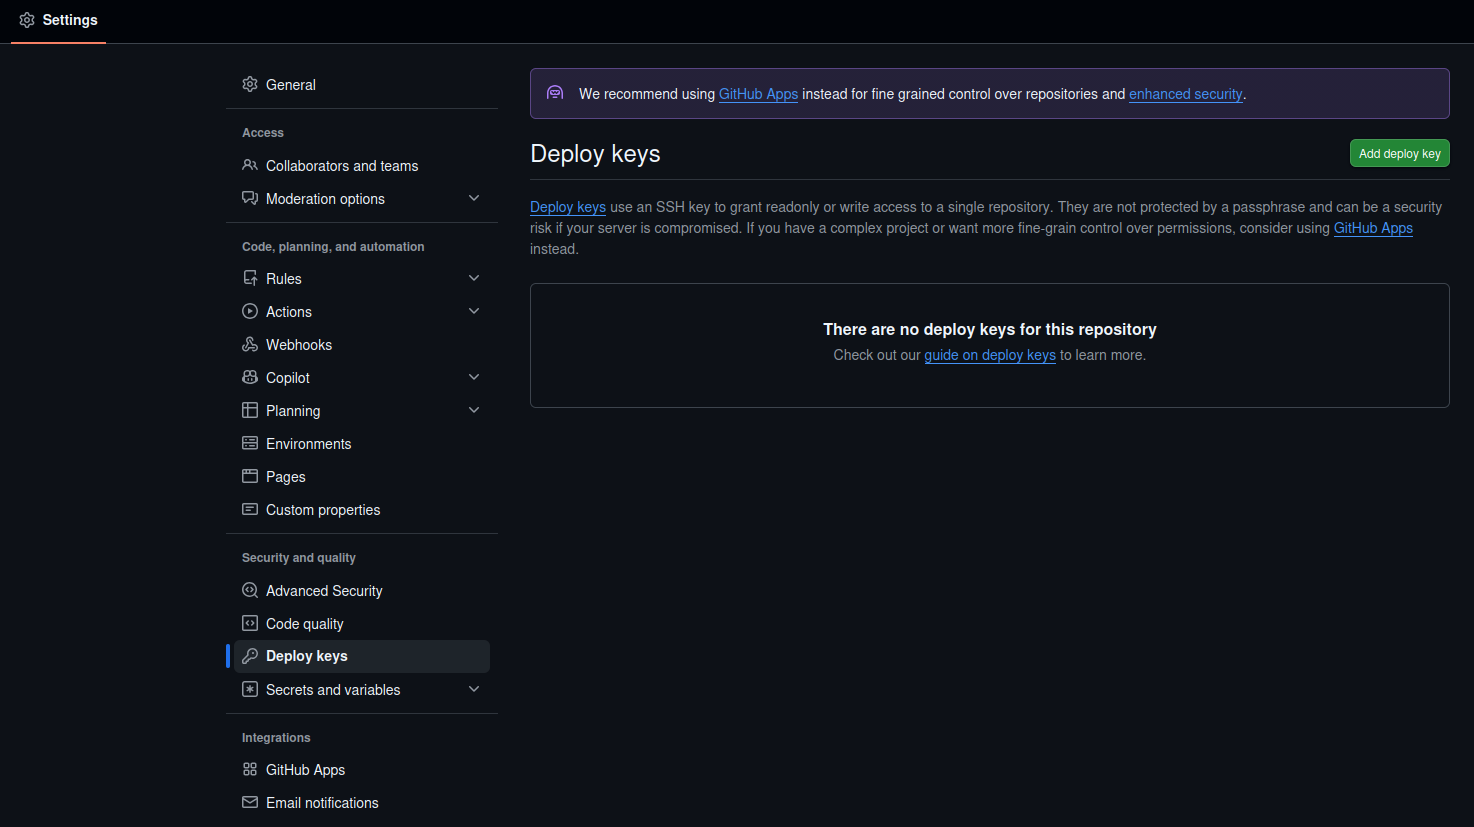
-
Paste & Authorize: Paste the SSH key you copied from Obmondo.
Important: Ensure that
Allow write accessis checked.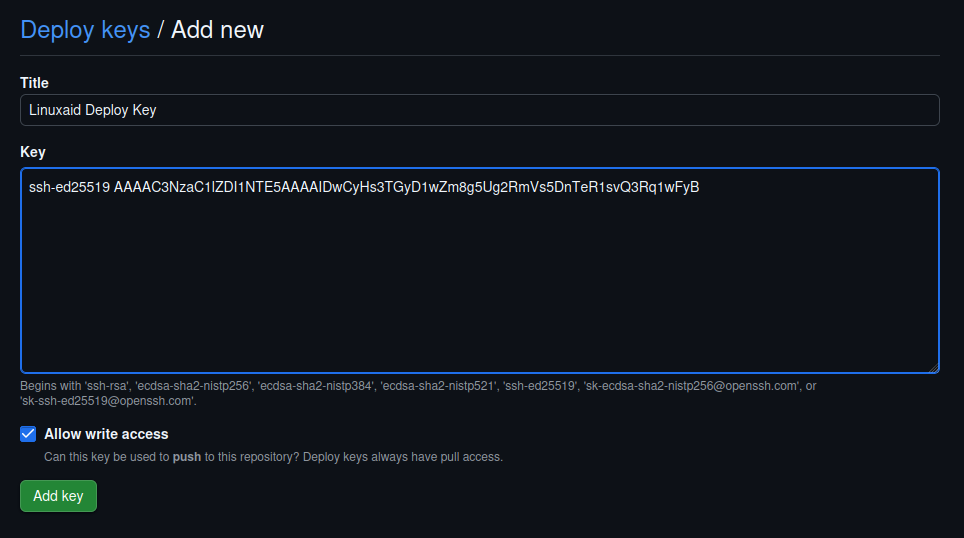
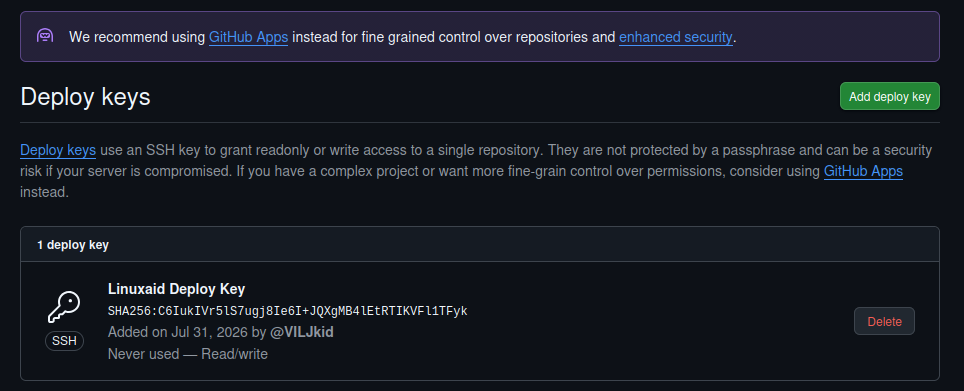
Phase 3: Verification
-
Verify Setup: Return to the Obmondo UI and click
Verify.Note: Ensure that your git repo has at least 1 file present, or the verification will fail.
